Developed by Sony for the CineAlta 4K range, the PMW-F55 is a compact, versatile camera. This type of camera can be easily used for both digital cinematography and broadcast television as well as multi-camera television production. However, in the latter case, a CA4000 adapter must be added to the PMW-F55. The PMW-F55 is equipped with a full 35mm CMOS sensor as a 4K image sensor and could very well claim to be one of the most mobile ca
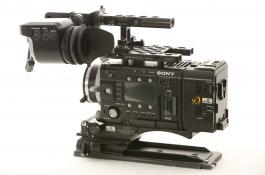
Developed by Sony for the CineAlta 4K range, the PMW-F55 is a compact, versatile camera. This type of camera can be easily used for both digital cinematography and broadcast television, as well as multi-camera television production. However, in the latter case, a CA4000 adapter must be added to the PMW-F55. The PMW-F55 is equipped with a full 35mm CMOS sensor as a 4K image sensor and could very well claim to be one of the most mobile camera systems with a highly flexible guide interface. In other words, "A camera for all situations."
The Super35 CMOS sensor was developed for the PMW-F55 using Exmor and Pregius technologies, and therefore offers several advantages over conventional CMOS sensors. Pregius technology brought Global Shutter mode and Exmor improved noise reduction.
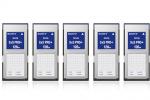
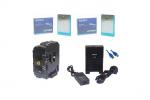
This camera has excellent quality characteristics; it is capable of storing 16-bit RAW video with lossless compression of 3.6: 1, linear dynamic range and 14 stops latitude. In fact, to get such high-quality video characteristics, you need to add the small-sized RAW recorder AXS-R5, which is an option of this camera; it easily connects to the camera and uses an AXSM card for recording. In addition, the camera can record to the SxS card in any of the following video formats:
- XAVC (AVC/H.264 High 4:2:2 Intra Profile)
- 4K/QFHD: VBR, 600 Mbps max.
- 2K: VBR, 220 Mbps max.
- HD: SMPTE RP2027 Class100 compliant;
- MPEG HD422 (MPEG-2 Long GOP)
- HD 422 mode: CBR, 50 Mbps,
- MPEG-2 422P@HL;
- SR SStP (MPEG-4 Simple Studio Profile)
- HD: SR-SQ 444,
- HD: SR-SQ 422,
- HD: SR-Lite 422;
- Apple ProRes
- HD: ProRes 4444,
- HD: ProRes 422 HQ,
- HD: ProRes 422;
- Avid DNxHD®
- HD: DNxHD 220x (10-bit 4:2:2),
- HD: DNxHD 145 (8-bit 4:2:2).
At the same time, some of the listed video formats can be configured to be recorded simultaneously with RAW recording to obtain footage in two formats. There is a variant of recording two video formats on one SxS memory card in the camera. One format is basic and you can choose from the following:
XAVC 4096×2160 / XAVC 3840×2160 (29.97P / 25P / 23.98P) or
SStP SR-SQ 444 / SStP SR-SQ 422 (59.94i / 29.97P),
and another format - auxiliary, which will be saved on the same card, in this case it can be MPEG 2 Proxy (MPEG2 1920x1080). This camera functionality is especially useful for pre-editing video on set, since MPEG2 1920 × 1080 does not require a lot of hardware resources to work with it.
The camera allows you to set a certain type of scan of the image sensor to form the required frame size, for example:
Normal (4K Super 35 mm size of image);
2K Full (2K Super 35 mm size of image);
2K Center (that is equivalent Super 16 mm 2K size of image),
The last two types of sensor scans allow full use of 35mm lenses as well as 16mm lenses when shooting at higher record speeds.
The line of standard frame rates to choose from is impressive, too:
59.94 / 50 / 29.97 / 25 / 24 / 23.98 (fps),
Meanwhile, it is possible to change the actual frame rate from 1 to 60 fps in 1 fps increments for a 4K image, and for a 2K image you can select the rate from the values that appear in the menu additionally, such as:
66, 72, 75, 80, 90, 96, 100, 110, 120, 125, 135, 144, 150, 160, 168, 175, 180 and 240 fps.
The actual frame rate can only be selected if you have set XAVC and RAW as the video formats for recording. For others, you can only change the standard frame rate.
The basic sensitivity of the camera - 1250 ISO; however, it can be smoothly adjusted from ISO 500 to ISO 10,000, depending on the selected standard gamma curve (STD1, STD2, STD3, STD4, STD5, STD6) in the camera's TV mode. Exposure index is another option for working with camera sensitivity in cine mode, and you can choose a value from the following:
320EI: (4.0E) / 400EI: (4.3E) / 500EI: (4.7E) / 640EI: (5.0E) / 800EI: (5.3E) / 1000EI: (5.7E) / 1250EI: (6.0E) / 1600EI: (6.3E) / 2000EI: (6.7E) / 2500EI: (7.0E) / 3200EI: (7.3E) / 4000EI: (7.7E) / 5000EI: (8.0E),
The number of stops for the high tone region at full latitude is indicated next to each exposure index in parentheses.
In addition, for those who like to use the camera in TV mode, there is a conversion of ISO sensitivity units into gain units (dB), in which the line of gain steps will be displayed as follows:
–3dB / 0dB / 3dB / 6dB / 9dB / 12dB / 18dB.
The camera has two balanced inputs on XLR connectors according to the EIA RS-297-A standard, which are designed to record analog or digital audio. Linear Pulse Code Modulation (LPCM) is used to convert analog audio to digital with 24 bps, 48 kHz sampling parameters. To switch the inputs from two analog to four digital AES / EBU inputs, you need to use the two mechanical switches next to the XLR connectors, which have LINE / MIC / AES / EBU positions per channel. It is also possible to enable/disable +48 V to power the microphone on the camera for each channel.
The camera has the ability to select the brightness characteristics separately for the monitor, 3 and 4 video outputs, as well as for 1, 2 video outputs and to set the brightness characteristic for recording on the SxS memory card. A brightness characteristic can be selected from a set of standard curves or Look Profiles from Sony and curves created by users using CvpFileEditor or RAW Viewer. You can download these programs free from the Sony website. (https://pro.sony/ue_US/support-resources/software/00250491 и https://pro.sony/ue_US/support-resources/axs-r5/software/mpueus00000222). The set of brightness characteristics and Look Profiles of the camera are as follows:
709(800%) (The luminance characteristic for which a dynamic range is extended up to 800% due to light compression in the bright area of the dynamic range, which is defined by a value from 70% to 800%, using the ITU-R709 standard as a basis in the characteristic);
HG8009G40 (The luminance characteristic for which dynamic range is 800%, white level limit is 109%, and video output is 40% when exposing 18% gray card);
HG8009G33 (The luminance characteristic for which dynamic range is 800%, white level limit is 109%, and video output is 33% when exposing 18% gray card);
S-Log2 (The logarithmic luminance transmission characteristic for which dynamic range is 1300% and which is matched to a dynamic range of a video monitor);
S-Log3 (The logarithmic luminance transmission characteristic for which the dynamic range is 1300% and is close in its parameters to the Cineon Log curve and the luminance characteristic of the film);
LC-709 (Output tone curve is low contrast video tone. Highlight is lightly compressed and easy to expand by grading. Shadow detail is also lightly compressed. Color reproduction produces better skin tone. Total color is less saturated 709 to provide more room for color grading);
LC-709typeA (This Look Profile is a different version of “LC-709”. This profile is simulated conventional digital camera such as Sony HDW-F900 and Alexa. Skin tone is slightly different with LC-709. Mid-tone contrast is the same as “LC-709”. Black has some offset to keep compatibility with conventional cameras. Total color is less saturated 709 to provide more room for color grading);
SLog2-709 (Total color is less saturated 709 to provide more room for color grading. Tone curve keeps S-Log2. This Look Profile is suitable for people who have good experience to handle S-Log2 directly);
Cine+709 (This profile emulates film color. Nega-film and Posi-film are combined one and applied tone for TV production. This Look Profile is designed monitoring use. If you want to grade based on this Look Profile, you should be set this Profile as output LUT in the grading system. This means grading parameter should be applied S-Log2/S-Gamut, and then Profile is applied after that).
And, of course, it is possible to load user-created curves into the camera:
User LUT / User 3D LUT.
The PMW-F55 has the ability to select and apply different color spaces for recording and/or outputs, such as:
S-Gamut/SLog2 (Large color space comparable to film color space.);
S-Gamut3.Cine/SLog3 (Color space that can be easily adapted to DCIP3 digital cinema requirements);
S-Gamut3/Slog3 (The large color space is optimized by original Sony image distortion correction technology and adapted to the future standardized color space);
Matrix (This setting allows you to select a color space by changing the matrix parameters).
By selecting the TV mode in the camera, you have access to an additional menu of an image painting that allows you to do color grading on set. The list of image parameters available for changing is huge. You can adjust the black level within an acceptable range and adjust the white clipping in the range of 90% -109% for the image signal. We can also perform lens flare correction for different lenses and store its value in the lens file along with other necessary lens settings, available to change in the same menu. There is an extensive possibility of working with the gamma curve; it can be adjusted smoothly and stepwise. This adjustment can be done by choosing a gamma curve exponent from 0.35 to 0.90 in 0.05 increments or by changing the master gamma correction, and you can also change the gamma separately for the R, G, B channels. In the TV mode of the camera, you can also use the knee compensation function of the gamma curve in the bright area of the dynamic range from 75% to 109% of the image signal by selecting the knee point and the knee slope value. In addition, you can choose to use a gamma curve from a wide variety of standard Sony gamma curves, such as:
STD1: DVW (Кривая эквивалентная Гамме кривой обычного DVW камкордера);
STD2: ×4.5 (×4.5 gain);
STD3: ×3.5 (×3.5 gain);
STD4: 240M (SMPTE-240M equivalent);
STD5: R709 (ITU-R709 equivalent);
STD6: ×5.0 (×5.0 gain);
HG1 3250G36 (Signals, for which the dynamic range is 325%, white limit is 100%, and use hyper gamma, for which video output with 18% gray card is 36%);
HG2 4600G30 (Signals, for which the dynamic range is 460%, white limit is 100%, and use hyper gamma, for which video output with 18% gray card is 30%);
HG3 3259G40 (Signals, for which the dynamic range is 325%, white limit is 109%, and use hyper gamma, for which video output with 18% gray card is 40%););
HG4 4609G33 (Signals, for which the dynamic range is 460%, white limit is 109%, and use hyper gamma, for which video output with 18% gray card is 33%);
HG7 8009G40 (Signals, for which the dynamic range is 800%, white limit is 109%, and use hyper gamma, for which video output with 18% gray card is 40%);
HG8 8009G33 (Signals, for which the dynamic range is 800%, white limit is 109%, and use hyper gamma, for which video output with 18% gray card is 33%);
U1-U6: User created curve (Any LUT signal that is imported from an SD card);
S-Log2 (Log signal with 1300% dynamic range, for which the post production process should be performed, and visibility for Video Monitor is considered);
S-Log3 (Log signal with 1300% dynamic range, which is close to Cineon Log curve, and the characteristics of film).
When you select a standard gamma curve from the above set of curves (STD1, STD2, STD3, STD4, STD5, STD6), you can adjust Black Gamma in one of the selected available brightness ranges: 0% - 3, 6%, or 0% - 28%.
In TV mode, the camera allows you to directly influence its spectral characteristic. This can be done through the "Matrix" item of the "Paint" menu, in which you can select a standard color matrix from the preset ones:
1: SMPTE240M;
2: ITU-709;
3: SMPTE Wide;
4: NTSC;
5: EBU;
10: S-Gamut3.Cine Like;
11: S-Gamut3 Like.
Another way to work with the matrix in the camera is to be able to set the User Matrix mode and directly change the matrix coefficients until the desired image color is obtained. You can also directly work with primary and secondary colors separately, changing the hue and saturation within acceptable limits in the "Multiple Matrix Correction" item of the above menu.
In a separate category that enhances the image quality of this camera, there are image detail correction options. They can also be configured in TV mode. These are the following parameters:
Level (Sets the overall detail signal level);
H/V Ratio (Sets the mixing ratio of the horizontal and vertical detail signals);
Crispening (Sets the detail signal crispening level);
Level Depend Level (Sets the Level Depend function (that suppresses the detail amount when the video signal amplitude is small);
Frequency (Sets the frequency (thickness) of the H detail signal);
Knee Aperture Level (Adjusts the detail amount added to the highlight part above the knee point);
Limit (Adjusts the detail signal limiter);
White Limit (Adjusts the limiter in the white direction of the detail signal);
Black Limit (Adjusts the limiter in the black direction of the detail signal);
V Black Limit (Adjusts the limiter in the black direction of the detail signal’s V-component);
V Detail Creation (NAM / Y / G / G+R) (Selects the source signal from which the V-detail signal is created).
It is possible to amplify or attenuate a detail signal in the skin tone area of the image. There is a separate menu item for this. In the aperture corrector item of the Paint menu, you can compensate for the reduction of the image signal in the high-frequency response area, adjusting the level of compensation within acceptable limits.
In addition, the camera has many useful functions that will come in handy during operation. The camera has a "Slow Shutter" function, after activation of which the frame rate will be indicated by the number of accumulated frames. This function allows you to obtain clear image with low noise in low light or surreal pictures with afterimages. The camera can shoot time-lapse video at variable intervals. This feature can be useful for shooting slow motion subjects. In this case, you can set the frame capture interval from the offered list of intervals:
1 to 10 / 15 / 20 / 30 / 40 / 50 (sec.)
1 to 10 / 15 / 20 / 30 / 40 / 50 (min.)
1 / 2 / 3 / 4 / 6 / 12 / 24 (hours)
Besides, you can choose the number of frames in one take, values: 2; 6; 12 frames (XAVC 50P or 59.94P) or 1; 3; 6; 9 frames (XAVC 23.98P, 24P, 25P, 29.97P, 50i or 59.94i). The camera has a function of pre-record video and audio data into the camera's internal flash memory, which will provide you with some useful footage before you start shooting. In this case, the reserve of footage can have duration of 2 to 15 seconds.
The PMW-F55 has two tools for controlling the exposure. One is Zebra 1&2 and the other is False Color Display. There are two zebras in the camera. Zebra1 operation can be set in the range from 0% to 107%, the other can operate in a wider range of the image signal level from 0% to 109%. For example, you can use Zebra2 to control the exposure in the highlight area, choosing the range of the image signal to activate Zebra2 from 50% to 109%, and another to control the exposure in the shadows (0% - 20%). False Color Display is an exposure tool that shows the distribution of brightness across an image using false colors. However, in this camera, it is limited enough to work. It can only work when the S-Log2 curve is set as the main curve for recording to media and displaying in the viewfinder. This limitation can rather be attributed to the category of disadvantages of the camera, but in fairness, it should be noted that zebras could be used at any time, with any settings in this camera.
Another advantage of the camera is the very low power consumption of the power supply in operating mode. According to the technical specification for this camera, battery-operating time is approximately 150 min with BP-FL75. In addition, our service staffs are repeatedly convinced of low consumption in practice.
To summarize the above, it is safe to say that the PMW-F55 has a huge number of settings for shooting, allowing you to fully express your creativity, creating great video footage. Perhaps, there are no shooting tasks that the camera could not overcome, including highly specialized tasks, for example, shooting at a sufficiently high speed of 240 fps or shooting slow-motion subjects (1 frame in 24 hours). The presence of a set of tools for working with images allows you to develop and declare your author's style. However, despite the many advantages of the camera's comprehensive functionality, achieving this goal on set can also be a challenge due to the lack of time for additional creative searches. In order not to face a problem, you need to have several factors, namely: the availability of time and a thorough knowledge of the camera settings. We are happy to provide you with both. In our rentals, you can get time to prepare the camera for shooting in accordance with the tasks set by you in the pre-shooting period. As well as the help of a qualified specialist, with the technical support of which, you will certainly be able to get the required result.
mera systems with a highly flexible guide interface. In other words, "A camera for all situations."
The Super35 CMOS sensor was developed for the PMW-F55 using Exmor and Pregius technologies and therefore offers several advantages over conventional CMOS sensors. Pregius technology brought Global Shutter mode and Exmor improved noise reduction.
This camera has excellent quality characteristics; it is capable of storing 16-bit RAW video with lossless compression of 3.6: 1, linear dynamic range and 14 stops latitude. In fact, to get such high-quality video characteristics, you need to add the small-sized RAW recorder AXS-R5, which is an option of this camera; it easily connects to the camera and uses an AXSM card for recording. In addition, the camera can record to the SxS card in any of the following video formats:
- XAVC (AVC/H.264 High 4:2:2 Intra Profile)
- 4K/QFHD: VBR, 600 Mbps max.
- 2K: VBR, 220 Mbps max.
- HD: SMPTE RP2027 Class100 compliant;
- MPEG HD422 (MPEG-2 Long GOP)
- HD 422 mode: CBR, 50 Mbps,
- MPEG-2 422P@HL;
- SR SStP (MPEG-4 Simple Studio Profile)
- HD: SR-SQ 444,
- HD: SR-SQ 422,
- HD: SR-Lite 422;
- Apple ProRes
- HD: ProRes 4444,
- HD: ProRes 422 HQ,
- HD: ProRes 422;
- Avid DNxHD®
- HD: DNxHD 220x (10-bit 4:2:2),
- HD: DNxHD 145 (8-bit 4:2:2).
At the same time, some of the listed video formats can be configured to be recorded simultaneously with RAW recording to obtain footage in two formats. There is a variant of recording two video formats on one SxS memory card in the camera. One format is basic and you can choose from the following:
XAVC 4096×2160 / XAVC 3840×2160 (29.97P / 25P / 23.98P) or
SStP SR-SQ 444 / SStP SR-SQ 422 (59.94i / 29.97P),
and another format - auxiliary, which will be saved on the same card, in this case it can be MPEG 2 Proxy (MPEG2 1920x1080). This camera functionality is especially useful for pre-editing video on set, since MPEG2 1920 × 1080 does not require a lot of hardware resources to work with it.
The camera allows you to set a certain type of scan of the image sensor to form the required frame size, for example:
Normal (4K Super 35 mm size of image);
2K Full (2K Super 35 mm size of image);
2K Center (that is equivalent Super 16 mm 2K size of image),
The last two types of sensor scans allow full use of 35mm lenses as well as 16mm lenses when shooting at higher record speeds.
The line of standard frame rates to choose from is impressive too:
59.94 / 50 / 29.97 / 25 / 24 / 23.98 (fps),
Meanwhile, it is possible to change the actual frame rate from 1 to 60 fps in 1 fps increments for a 4K image, and for a 2K image you can select the rate from the values that appear in the menu additionally, such as:
66, 72, 75, 80, 90, 96, 100, 110, 120, 125, 135, 144, 150, 160, 168, 175, 180 and 240 fps.
The actual frame rate can only be selected if you have set XAVC and RAW as the video formats for recording. For others, you can only change the standard frame rate.
The basic sensitivity of the camera - 1250 ISO; however, it can be smoothly adjusted from ISO 500 to ISO 10,000, depending on the selected standard gamma curve (STD1, STD2, STD3, STD4, STD5, STD6) in the camera's TV mode. Exposure index is another option for working with camera sensitivity in cine mode and you can choose a value from the following:
320EI: (4.0E) / 400EI: (4.3E) / 500EI: (4.7E) / 640EI: (5.0E) / 800EI: (5.3E) / 1000EI: (5.7E) / 1250EI: (6.0E) / 1600EI: (6.3E) / 2000EI: (6.7E) / 2500EI: (7.0E) / 3200EI: (7.3E) / 4000EI: (7.7E) / 5000EI: (8.0E),
The number of stops for the high tone region at full latitude is indicated next to each exposure index in parentheses.
In addition, for those who like to use the camera in TV mode, there is a conversion of ISO sensitivity units into gain units (dB), in which the line of gain steps will be displayed as follows:
–3dB / 0dB / 3dB / 6dB / 9dB / 12dB / 18dB.
The camera has two balanced inputs on XLR connectors according to the EIA RS-297-A standard, which are designed to record analog or digital audio. Linear Pulse Code Modulation (LPCM) is used to convert analog audio to digital with 24 bps, 48 kHz sampling parameters. To switch the inputs from two analog to four digital AES / EBU inputs, you need to use the two mechanical switches next to the XLR connectors, which have LINE / MIC / AES / EBU positions per channel. It is also possible to enable/disable +48 V to power the microphone on the camera for each channel.
The camera has the ability to select the brightness characteristics separately for the monitor, 3 and 4 video outputs, as well as for 1, 2 video outputs and to set the brightness characteristic for recording on the SxS memory card. A brightness characteristic can be selected from a set of standard curves or Look Profiles from Sony and curves created by users using CvpFileEditor or RAW Viewer. You can download these programs free from the Sony website. (https://pro.sony/ue_US/support-resources/software/00250491 и https://pro.sony/ue_US/support-resources/axs-r5/software/mpueus00000222). The set of brightness characteristics and Look Profiles of the camera are as follows:
709(800%) (The luminance characteristic for which a dynamic range is extended up to 800% due to light compression in the bright area of the dynamic range, which is defined by a value from 70% to 800%, using the ITU-R709 standard as a basis in the characteristic);
HG8009G40 (The luminance characteristic for which dynamic range is 800%, white level limit is 109%, and video output is 40% when exposing 18% gray card);
HG8009G33 (The luminance characteristic for which dynamic range is 800%, white level limit is 109%, and video output is 33% when exposing 18% gray card);
S-Log2 (The logarithmic luminance transmission characteristic for which dynamic range is 1300% and which is matched to a dynamic range of a video monitor);
S-Log3 (The logarithmic luminance transmission characteristic for which the dynamic range is 1300% and is close in its parameters to the Cineon Log curve and the luminance characteristic of the film);
LC-709 (Output tone curve is low contrast video tone. Highlight is lightly compressed and easy to expand by grading. Shadow detail is also lightly compressed. Color reproduction produces better skin tone. Total color is less saturated 709 to provide more room for color grading);
LC-709typeA ( This Look Profile is different version of “LC-709”. This profile is simulated conventional digital camera such as Sony HDW-F900 and Alexa. Skin tone is slightly different with LC-709. Mid tone contrast is the same as “LC-709”. Black has some offset to keep compatibility with conventional cameras. Total color is less saturated 709 to provide more room for color grading);
SLog2-709 (Total color is less saturated 709 to provide more room for color grading. Tone curve keeps S-Log2. This Look Profile is suitable for people who have good experience to handle S-Log2 directly);
Cine+709 (This profile emulates film color. Nega-film and Posi-film are combined one and applied tone for TV production. This Look Profile is designed monitoring use. If you want to grade based on this Look Profile, you should be set this Profile as output LUT in the grading system. This means grading parameter should be applied S-Log2/S-Gamut, and then Profile is applied after that).
And, of course, it is possible to load user-created curves into the camera:
User LUT / User 3D LUT.
The PMW-F55 has the ability to select and apply different color spaces for recording and / or outputs, such as:
S-Gamut/SLog2 (Large color space comparable to film color space.);
S-Gamut3.Cine/SLog3 (Color space that can be easily adapted to DCIP3 digital cinema requirements);
S-Gamut3/Slog3 (The large color space is optimized by original Sony image distortion correction technology and adapted to the future standardized color space);
Matrix (This setting allows you to select a color space by changing the matrix parameters).
By selecting the TV mode in the camera, you have access to an additional menu of an image painting that allows you to do color grading on set. The list of image parameters available for changing is huge. You can adjust the black level within an acceptable range and adjust the white clipping in the range of 90% -109% for the image signal. We can also perform lens flare correction for different lenses and store its value in the lens file along with other necessary lens settings, available to change in the same menu. There is an extensive possibility of working with the gamma curve; it can be adjusted smoothly and stepwise. This adjustment can be done by choosing a gamma curve exponent from 0.35 to 0.90 in 0.05 increments or by changing the master gamma correction and you can also change the gamma separately for the R, G, B channels. In the TV mode of the camera, you can also use the knee compensation function of the gamma curve in the bright area of the dynamic range from 75% to 109% of the image signal by selecting the knee point and the knee slope value. In addition, you can choose to use a gamma curve from a wide variety of standard Sony gamma curves, such as:
STD1: DVW (Кривая эквивалентная Гамме кривой обычного DVW камкордера);
STD2: ×4.5 (×4.5 gain);
STD3: ×3.5 (×3.5 gain);
STD4: 240M (SMPTE-240M equivalent);
STD5: R709 (ITU-R709 equivalent);
STD6: ×5.0 (×5.0 gain);
HG1 3250G36 (Signals, for which the dynamic range is 325%, white limit is 100%, and use hyper gamma, for which video output with 18% gray card is 36%);
HG2 4600G30 (Signals, for which the dynamic range is 460%, white limit is 100%, and use hyper gamma, for which video output with 18% gray card is 30%);
HG3 3259G40 (Signals, for which the dynamic range is 325%, white limit is 109%, and use hyper gamma, for which video output with 18% gray card is 40%););
HG4 4609G33 (Signals, for which the dynamic range is 460%, white limit is 109%, and use hyper gamma, for which video output with 18% gray card is 33%);
HG7 8009G40 (Signals, for which the dynamic range is 800%, white limit is 109%, and use hyper gamma, for which video output with 18% gray card is 40%);
HG8 8009G33 (Signals, for which the dynamic range is 800%, white limit is 109%, and use hyper gamma, for which video output with 18% gray card is 33%);
U1-U6: User created curve (Any LUT signal that is imported from an SD card);
S-Log2 (Log signal with 1300% dynamic range, for which the post production process should be performed, and visibility for Video Monitor is considered);
S-Log3 (Log signal with 1300% dynamic range, which is close to Cineon Log curve, and the characteristics of film).
When you select a standard gamma curve from the above set of curves (STD1, STD2, STD3, STD4, STD5, STD6), you can adjust Black Gamma in one of the selected available brightness ranges: 0% - 3, 6%, or 0% - 28%.
In TV mode, the camera allows you to directly influence its spectral characteristic. This can be done through the "Matrix" item of the "Paint" menu, in which you can select a standard color matrix from the preset ones:
1: SMPTE240M;
2: ITU-709;
3: SMPTE Wide;
4: NTSC;
5: EBU;
10: S-Gamut3.Cine Like;
11: S-Gamut3 Like.
Another way to work with the matrix in the camera is to be able to set the User Matrix mode and directly change the matrix coefficients until the desired image color is obtained. You can also directly work with primary and secondary colors separately, changing the hue and saturation within acceptable limits in the "Multiple Matrix Correction" item of the above menu.
In a separate category that enhances the image quality of this camera, there are image detail correction options. They can also be configured in TV mode. These are the following parameters:
Level (Sets the overall detail signal level);
H/V Ratio (Sets the mixing ratio of the horizontal and vertical detail signals);
Crispening (Sets the detail signal crispening level);
Level Depend Level (Sets the level depend function (that suppresses the detail amount when the video signal amplitude is small);
Frequency (Sets the frequency (thickness) of the H detail signal);
Knee Aperture Level (Adjusts the detail amount added to the highlight part above the knee point);
Limit (Adjusts the detail signal limiter);
White Limit (Adjusts the limiter in the white direction of the detail signal);
Black Limit (Adjusts the limiter in the black direction of the detail signal);
V Black Limit (Adjusts the limiter in the black direction of the detail signal’s V-component);
V Detail Creation (NAM / Y / G / G+R) (Selects the source signal from which the V-detail signal is created).
It is possible to amplify or attenuate a detail signal in the skin tone area of the image. There is a separate menu item for this. In the aperture corrector item of the Paint menu, you can compensate for the reduction of the image signal in the high-frequency response area, adjusting the level of compensation within acceptable limits.
In addition, the camera has many useful functions that will come in handy during operation. The camera has a "Slow Shutter" function, after activation of which the frame rate will be indicated by the number of accumulated frames. This function allows you to obtain clear image with low noise in low light or surreal pictures with afterimages. The camera can shoot time-lapse video at variable intervals. This feature can be useful for shooting slow motion subjects. In this case, you can set the frame capture interval from the offered list of intervals:
1 to 10 / 15 / 20 / 30 / 40 / 50 (sec.)
1 to 10 / 15 / 20 / 30 / 40 / 50 (min.)
1 / 2 / 3 / 4 / 6 / 12 / 24 (hours)
Besides, you can choose the number of frames in one take, values: 2; 6; 12 frames (XAVC 50P or 59.94P) or 1; 3; 6; 9 frames (XAVC 23.98P, 24P, 25P, 29.97P, 50i or 59.94i). The camera has a function of pre-record video and audio data into the camera's internal flash memory, which will provide you with some useful footage before you start shooting. In this case, the reserve of footage can have duration of 2 to 15 seconds.
The PMW-F55 has two tools for controlling the exposure. One is Zebra 1&2 and the other is False Color Display. There are two zebras in the camera. Zebra1 operation can be set in the range from 0% to 107%, the other can operate in a wider range from 0% to 109%. For example, you can use Zebra2 to control the exposure in the highlight area, choosing the range of the image signal to activate Zebra2 from 50% to 109%, and another to control the exposure in the shadows (0% - 20%). False Color Display is an exposure tool that shows the distribution of brightness across an image using false colors. However, in this camera, it is limited enough to work. It can only work when the S-Log2 curve is set as the main curve for recording to media and displaying in the viewfinder. This limitation can rather be attributed to the category of disadvantages of the camera, but in fairness, it should be noted that zebras could be used at any time, with any settings in this camera.
Another advantage of the camera is the very low power consumption of the power supply in operating mode. According to the technical specification for this camera, battery-operating time is approximately 150 min with BP-FL75. In addition, our service staffs are repeatedly convinced of low consumption in practice.
To summarize the above, it is safe to say that the PMW-F55 has a huge number of settings for shooting, allowing you to fully express your creativity, creating great video footage. Perhaps, there are no shooting tasks that the camera could not overcome, including highly specialized tasks, for example, shooting at a sufficiently high speed of 240 frames per second or shooting slow-motion subjects (1 frame in 24 hours). The presence of a set of tools for working with images allows you to develop and declare your author's style. However, despite the many advantages of the camera's comprehensive functionality, achieving this goal on set can also be a challenge due to the lack of time for additional creative searches. In order not to face a problem, you need to have several factors, namely: the availability of time and a thorough knowledge of the camera settings. “ILLUMINATOR FILM SERVICE” is happy to provide you with both. In our rentals, you can get time to prepare the camera for shooting in accordance with the tasks set by you in the pre-shooting period. As well as the help of a qualified specialist, with the technical support of which, you will certainly be able to get the required result.